Перейти к содержанию

Глубокая передача данных с помощью контекста

Обычно вы передаете информацию от родительского компонента к дочернему компоненту с помощью реквизитов. Но передача реквизитов может стать многословной и неудобной, если вам приходится передавать их через множество компонентов в середине, или если многим компонентам в вашем приложении нужна одна и та же информация. Context позволяет родительскому компоненту сделать некоторую информацию доступной для любого компонента в дереве под ним - независимо от глубины - без явной передачи ее через props.

  • Что такое "бурение реквизитов"
  • Как заменить повторяющуюся передачу реквизитов контекстом
  • Общие случаи использования контекста
  • Общие альтернативы контексту

Проблема с передачей реквизитов {/the-problem-with-passing-props/}

Передача реквизитов - это отличный способ явной передачи данных через дерево вашего пользовательского интерфейса компонентам, которые их используют.

Но передача реквизитов может стать многословной и неудобной, если вам нужно передать какой-то реквизит глубоко в дереве, или если многим компонентам нужен один и тот же реквизит. Ближайший общий предок может быть далеко от компонентов, которым нужны данные, а поднятие состояния вверх так высоко может привести к ситуации, называемой "prop drilling".

\<ДиаграммаГруппа>

\<Diagram name="passing_data_lifting_state" height={160} width={608} captionPosition="top" alt="Диаграмма с деревом из трех компонентов. Родительский компонент содержит пузырек, представляющий значение, выделенное фиолетовым цветом. Значение перетекает вниз к каждому из двух дочерних компонентов, оба выделены фиолетовым цветом." >

Подъем состояния вверх

\</Diagram> \<Diagram name="passing_data_prop_drilling" height={430} width={608} captionPosition="top" alt="Диаграмма с деревом из десяти узлов, каждый узел с двумя детьми или меньше. Корневой узел содержит пузырек, представляющий значение, выделенное фиолетовым цветом. Значение проходит вниз через два дочерних узла, каждый из которых передает значение, но не содержит его. Левый ребенок передает значение вниз двум детям, которые оба выделены фиолетовым цветом. Правый ребенок корня передает значение одному из двух своих детей - правому, который выделен фиолетовым цветом. Этот ребенок передает значение через своего единственного ребенка, который передает его обоим своим детям, выделенным фиолетовым цветом.">

Бурение реквизита

\</Diagram>

\</DiagramGroup>

Было бы здорово, если бы существовал способ "телепортировать" данные к тем компонентам в дереве, которым они нужны, без передачи реквизитов. С функцией контекста React это возможно!

Контекст: альтернатива передаче props {/context-an-alternative-to-passing-props/}

Контекст позволяет родительскому компоненту предоставлять данные всему дереву под ним. Существует множество вариантов использования контекста. Вот один из примеров. Рассмотрим компонент Heading, который принимает level для своего размера:

 1
 2
 3
 4
 5
 6
 7
 8
 9
10
11
12
13
14
15
16
17
import Heading from './Heading.js';
import Section from './Section.js';

export default function Page() {
    return (
        <Section>
            <Heading level={1}>Title</Heading>
            <Heading level={2}>Heading</Heading>
            <Heading level={3}>Sub-heading</Heading>
            <Heading level={4}>Sub-sub-heading</Heading>
            <Heading level={5}>Sub-sub-sub-heading</Heading>
            <Heading level={6}>
                Sub-sub-sub-sub-heading
            </Heading>
        </Section>
    );
}
1
2
3
4
5
export default function Section({ children }) {
    return (
        <section className="section">{children}</section>
    );
}
 1
 2
 3
 4
 5
 6
 7
 8
 9
10
11
12
13
14
15
16
17
18
export default function Heading({ level, children }) {
    switch (level) {
        case 1:
            return <h1>{children}</h1>;
        case 2:
            return <h2>{children}</h2>;
        case 3:
            return <h3>{children}</h3>;
        case 4:
            return <h4>{children}</h4>;
        case 5:
            return <h5>{children}</h5>;
        case 6:
            return <h6>{children}</h6>;
        default:
            throw Error('Unknown level: ' + level);
    }
}
1
2
3
4
5
6
.section {
    padding: 10px;
    margin: 5px;
    border-radius: 5px;
    border: 1px solid #aaa;
}

Допустим, вы хотите, чтобы несколько заголовков в одном разделе всегда имели одинаковый размер:

 1
 2
 3
 4
 5
 6
 7
 8
 9
10
11
12
13
14
15
16
17
18
19
20
21
22
23
24
25
26
27
28
29
30
31
import Heading from './Heading.js';
import Section from './Section.js';

export default function Page() {
    return (
        <Section>
            <Heading level={1}>Title</Heading>
            <Section>
                <Heading level={2}>Heading</Heading>
                <Heading level={2}>Heading</Heading>
                <Heading level={2}>Heading</Heading>
                <Section>
                    <Heading level={3}>Sub-heading</Heading>
                    <Heading level={3}>Sub-heading</Heading>
                    <Heading level={3}>Sub-heading</Heading>
                    <Section>
                        <Heading level={4}>
                            Sub-sub-heading
                        </Heading>
                        <Heading level={4}>
                            Sub-sub-heading
                        </Heading>
                        <Heading level={4}>
                            Sub-sub-heading
                        </Heading>
                    </Section>
                </Section>
            </Section>
        </Section>
    );
}
1
2
3
4
5
export default function Section({ children }) {
    return (
        <section className="section">{children}</section>
    );
}
 1
 2
 3
 4
 5
 6
 7
 8
 9
10
11
12
13
14
15
16
17
18
export default function Heading({ level, children }) {
    switch (level) {
        case 1:
            return <h1>{children}</h1>;
        case 2:
            return <h2>{children}</h2>;
        case 3:
            return <h3>{children}</h3>;
        case 4:
            return <h4>{children}</h4>;
        case 5:
            return <h5>{children}</h5>;
        case 6:
            return <h6>{children}</h6>;
        default:
            throw Error('Unknown level: ' + level);
    }
}
1
2
3
4
5
6
.section {
    padding: 10px;
    margin: 5px;
    border-radius: 5px;
    border: 1px solid #aaa;
}

В настоящее время вы передаете параметр level каждому <Heading> отдельно:

1
2
3
4
5
<Section>
    <Heading level={3}>About</Heading>
    <Heading level={3}>Photos</Heading>
    <Heading level={3}>Videos</Heading>
</Section>

Было бы неплохо, если бы вы могли передавать параметр level компоненту <Section> и удалять его из <Heading>. Таким образом можно было бы добиться того, чтобы все заголовки в одном разделе имели одинаковый размер:

1
2
3
4
5
<Section level={3}>
    <Heading>About</Heading>
    <Heading>Photos</Heading>
    <Heading>Videos</Heading>
</Section>

Но как компонент <Глава> может узнать уровень ближайшего к нему <Раздела>? *Для этого нужно, чтобы дочерний компонент мог "запрашивать" данные откуда-то сверху в дереве.

Вы не можете сделать это только с помощью реквизитов. Здесь в игру вступает контекст. Вы сделаете это в три шага:

  1. Создайте контекст. (Вы можете назвать его LevelContext, поскольку он предназначен для уровня заголовка).
  2. Используем этот контекст из компонента, которому нужны данные. (Heading будет использовать LevelContext).
  3. Предоставить этот контекст от компонента, который определяет данные. (Section будет предоставлять LevelContext).

Контекст позволяет родителю - даже очень далекому - предоставлять некоторые данные всему дереву внутри него.

\<ДиаграммаГруппа>

\<Diagram name="passing_data_context_close" height={160} width={608} captionPosition="top" alt="Диаграмма с деревом из трех компонентов. Родитель содержит пузырек, представляющий значение, выделенное оранжевым цветом, которое проецируется вниз на два дочерних компонента, каждый из которых выделен оранжевым цветом." >

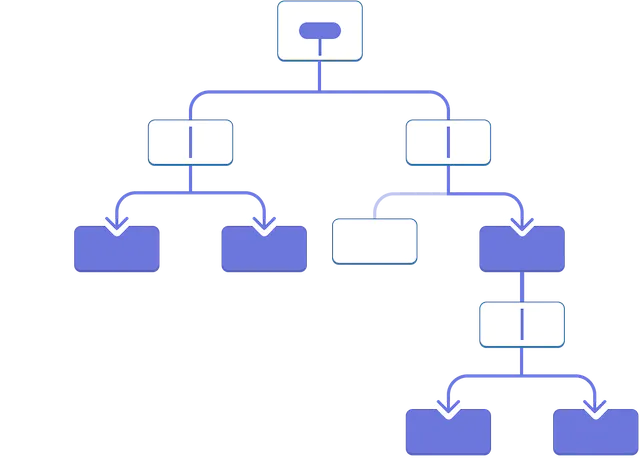
Использование контекста в близких дочерних компонентах

\<!--Диаграмма-->

\<Diagram name="passing_data_context_far" height={430} width={608} captionPosition="top" alt="Диаграмма с деревом из десяти узлов, каждый узел с двумя детьми или меньше. Корневой родительский узел содержит пузырек, представляющий значение, выделенное оранжевым цветом. Значение проецируется вниз непосредственно на четыре листа и один промежуточный компонент дерева, которые все выделены оранжевым цветом. Ни один из других промежуточных компонентов не выделен.">.

Использование контекста в далеких детях

\</Diagram>

\</DiagramGroup>

Шаг 1: Создание контекста {/step-1-create-the-context/}

Во-первых, вам нужно создать контекст. Вам нужно будет экспортировать его из файла, чтобы ваши компоненты могли его использовать:

 1
 2
 3
 4
 5
 6
 7
 8
 9
10
11
12
13
14
15
16
17
18
19
20
21
22
23
24
25
26
27
28
29
30
31
import Heading from './Heading.js';
import Section from './Section.js';

export default function Page() {
    return (
        <Section>
            <Heading level={1}>Title</Heading>
            <Section>
                <Heading level={2}>Heading</Heading>
                <Heading level={2}>Heading</Heading>
                <Heading level={2}>Heading</Heading>
                <Section>
                    <Heading level={3}>Sub-heading</Heading>
                    <Heading level={3}>Sub-heading</Heading>
                    <Heading level={3}>Sub-heading</Heading>
                    <Section>
                        <Heading level={4}>
                            Sub-sub-heading
                        </Heading>
                        <Heading level={4}>
                            Sub-sub-heading
                        </Heading>
                        <Heading level={4}>
                            Sub-sub-heading
                        </Heading>
                    </Section>
                </Section>
            </Section>
        </Section>
    );
}
1
2
3
4
5
export default function Section({ children }) {
    return (
        <section className="section">{children}</section>
    );
}
 1
 2
 3
 4
 5
 6
 7
 8
 9
10
11
12
13
14
15
16
17
18
export default function Heading({ level, children }) {
    switch (level) {
        case 1:
            return <h1>{children}</h1>;
        case 2:
            return <h2>{children}</h2>;
        case 3:
            return <h3>{children}</h3>;
        case 4:
            return <h4>{children}</h4>;
        case 5:
            return <h5>{children}</h5>;
        case 6:
            return <h6>{children}</h6>;
        default:
            throw Error('Unknown level: ' + level);
    }
}
1
2
3
import { createContext } from 'react';

export const LevelContext = createContext(1);
1
2
3
4
5
6
.section {
    padding: 10px;
    margin: 5px;
    border-radius: 5px;
    border: 1px solid #aaa;
}

Единственным аргументом для createContext является значение по умолчанию. Здесь 1 означает самый большой уровень заголовка, но вы можете передать любое значение (даже объект). Значение значения по умолчанию вы увидите в следующем шаге.

Шаг 2: Использование контекста {/step-2-use-the-context/}

Импортируйте хук useContext из React и ваш контекст:

1
2
import { useContext } from 'react';
import { LevelContext } from './LevelContext.js';

В настоящее время компонент Heading считывает level из реквизита:

1
2
3
export default function Heading({ level, children }) {
    // ...
}

Вместо этого удалите параметр level и считайте значение из только что импортированного контекста LevelContext:

1
2
3
4
export default function Heading({ children }) {
    const level = useContext(LevelContext);
    // ...
}

useContext - это хук. Как и useState и useReducer, хук можно вызывать только непосредственно внутри компонента React (не внутри циклов или условий). useContext сообщает React, что компонент Heading хочет прочитать LevelContext..

Теперь, когда у компонента Heading нет свойства level, вам больше не нужно передавать свойство level компоненту Heading в вашем JSX таким образом:

1
2
3
4
5
<Section>
    <Heading level={4}>Sub-sub-heading</Heading>
    <Heading level={4}>Sub-sub-heading</Heading>
    <Heading level={4}>Sub-sub-heading</Heading>
</Section>

Обновите JSX так, чтобы вместо него его получала Section:

1
2
3
4
5
<Section level={4}>
    <Heading>Sub-sub-heading</Heading>
    <Heading>Sub-sub-heading</Heading>
    <Heading>Sub-sub-heading</Heading>
</Section>

Напомним, что это разметка, которую вы пытались заставить работать:

 1
 2
 3
 4
 5
 6
 7
 8
 9
10
11
12
13
14
15
16
17
18
19
20
21
22
23
24
25
import Heading from './Heading.js';
import Section from './Section.js';

export default function Page() {
    return (
        <Section level={1}>
            <Heading>Title</Heading>
            <Section level={2}>
                <Heading>Heading</Heading>
                <Heading>Heading</Heading>
                <Heading>Heading</Heading>
                <Section level={3}>
                    <Heading>Sub-heading</Heading>
                    <Heading>Sub-heading</Heading>
                    <Heading>Sub-heading</Heading>
                    <Section level={4}>
                        <Heading>Sub-sub-heading</Heading>
                        <Heading>Sub-sub-heading</Heading>
                        <Heading>Sub-sub-heading</Heading>
                    </Section>
                </Section>
            </Section>
        </Section>
    );
}
1
2
3
4
5
export default function Section({ children }) {
    return (
        <section className="section">{children}</section>
    );
}
 1
 2
 3
 4
 5
 6
 7
 8
 9
10
11
12
13
14
15
16
17
18
19
20
21
22
import { useContext } from 'react';
import { LevelContext } from './LevelContext.js';

export default function Heading({ children }) {
    const level = useContext(LevelContext);
    switch (level) {
        case 1:
            return <h1>{children}</h1>;
        case 2:
            return <h2>{children}</h2>;
        case 3:
            return <h3>{children}</h3>;
        case 4:
            return <h4>{children}</h4>;
        case 5:
            return <h5>{children}</h5>;
        case 6:
            return <h6>{children}</h6>;
        default:
            throw Error('Unknown level: ' + level);
    }
}
1
2
3
import { createContext } from 'react';

export const LevelContext = createContext(1);
1
2
3
4
5
6
.section {
    padding: 10px;
    margin: 5px;
    border-radius: 5px;
    border: 1px solid #aaa;
}

Заметьте, что этот пример не совсем работает! Все заголовки имеют одинаковый размер, потому что хотя вы используете контекст, вы еще не предоставили его. React не знает, где его взять!

Если вы не предоставите контекст, React будет использовать значение по умолчанию, которое вы указали в предыдущем шаге. В этом примере вы указали 1 в качестве аргумента для createContext, поэтому useContext(LevelContext) возвращает 1, устанавливая все эти заголовки в <h1>. Давайте решим эту проблему, предоставив каждой Section свой собственный контекст.

Шаг 3: Предоставление контекста {/step-3-provide-the-context/}

Компонент Section в настоящее время отображает свои дочерние элементы:

1
2
3
4
5
export default function Section({ children }) {
    return (
        <section className="section">{children}</section>
    );
}

Оберните их провайдером контекста, чтобы предоставить им LevelContext:

 1
 2
 3
 4
 5
 6
 7
 8
 9
10
11
import { LevelContext } from './LevelContext.js';

export default function Section({ level, children }) {
    return (
        <section className="section">
            <LevelContext.Provider value={level}>
                {children}
            </LevelContext.Provider>
        </section>
    );
}

Это говорит React: "если какой-либо компонент внутри этой <Section> запрашивает LevelContext, дайте ему этот level". Компонент будет использовать значение ближайшего <LevelContext.Provider> в дереве пользовательского интерфейса над ним.

 1
 2
 3
 4
 5
 6
 7
 8
 9
10
11
12
13
14
15
16
17
18
19
20
21
22
23
24
25
import Heading from './Heading.js';
import Section from './Section.js';

export default function Page() {
    return (
        <Section level={1}>
            <Heading>Title</Heading>
            <Section level={2}>
                <Heading>Heading</Heading>
                <Heading>Heading</Heading>
                <Heading>Heading</Heading>
                <Section level={3}>
                    <Heading>Sub-heading</Heading>
                    <Heading>Sub-heading</Heading>
                    <Heading>Sub-heading</Heading>
                    <Section level={4}>
                        <Heading>Sub-sub-heading</Heading>
                        <Heading>Sub-sub-heading</Heading>
                        <Heading>Sub-sub-heading</Heading>
                    </Section>
                </Section>
            </Section>
        </Section>
    );
}
 1
 2
 3
 4
 5
 6
 7
 8
 9
10
11
import { LevelContext } from './LevelContext.js';

export default function Section({ level, children }) {
    return (
        <section className="section">
            <LevelContext.Provider value={level}>
                {children}
            </LevelContext.Provider>
        </section>
    );
}
 1
 2
 3
 4
 5
 6
 7
 8
 9
10
11
12
13
14
15
16
17
18
19
20
21
22
import { useContext } from 'react';
import { LevelContext } from './LevelContext.js';

export default function Heading({ children }) {
    const level = useContext(LevelContext);
    switch (level) {
        case 1:
            return <h1>{children}</h1>;
        case 2:
            return <h2>{children}</h2>;
        case 3:
            return <h3>{children}</h3>;
        case 4:
            return <h4>{children}</h4>;
        case 5:
            return <h5>{children}</h5>;
        case 6:
            return <h6>{children}</h6>;
        default:
            throw Error('Unknown level: ' + level);
    }
}
1
2
3
import { createContext } from 'react';

export const LevelContext = createContext(1);
1
2
3
4
5
6
.section {
    padding: 10px;
    margin: 5px;
    border-radius: 5px;
    border: 1px solid #aaa;
}

Это тот же результат, что и в оригинальном коде, но вам не нужно передавать свойство level каждому компоненту Heading! Вместо этого, он "вычисляет" уровень заголовка, спрашивая ближайший Section выше:

  1. Вы передаете реквизит level компоненту <Section>.
  2. Section оборачивает свои дочерние элементы в <LevelContext.Provider value={level}>.
  3. Heading запрашивает ближайшее значение LevelContext выше с помощью useContext(LevelContext).

Использование и предоставление контекста из одного и того же компонента {/using-and-providing-context-from-the-same-component/}

В настоящее время вы все еще должны указывать уровень каждой секции вручную:

1
2
3
4
5
6
7
8
export default function Page() {
  return (
    <Section level={1}>
      ...
      <Section level={2}>
        ...
        <Section level={3}>
          ...

Поскольку контекст позволяет вам читать информацию из компонента выше, каждый Section мог бы читать level из Section выше, и передавать level + 1 вниз автоматически. Вот как это можно сделать:

 1
 2
 3
 4
 5
 6
 7
 8
 9
10
11
12
13
import { useContext } from 'react';
import { LevelContext } from './LevelContext.js';

export default function Section({ children }) {
    const level = useContext(LevelContext);
    return (
        <section className="section">
            <LevelContext.Provider value={level + 1}>
                {children}
            </LevelContext.Provider>
        </section>
    );
}

С этим изменением вам не нужно передавать параметр level либо в <Section>, либо в <Heading>:

 1
 2
 3
 4
 5
 6
 7
 8
 9
10
11
12
13
14
15
16
17
18
19
20
21
22
23
24
25
import Heading from './Heading.js';
import Section from './Section.js';

export default function Page() {
    return (
        <Section>
            <Heading>Title</Heading>
            <Section>
                <Heading>Heading</Heading>
                <Heading>Heading</Heading>
                <Heading>Heading</Heading>
                <Section>
                    <Heading>Sub-heading</Heading>
                    <Heading>Sub-heading</Heading>
                    <Heading>Sub-heading</Heading>
                    <Section>
                        <Heading>Sub-sub-heading</Heading>
                        <Heading>Sub-sub-heading</Heading>
                        <Heading>Sub-sub-heading</Heading>
                    </Section>
                </Section>
            </Section>
        </Section>
    );
}
 1
 2
 3
 4
 5
 6
 7
 8
 9
10
11
12
13
import { useContext } from 'react';
import { LevelContext } from './LevelContext.js';

export default function Section({ children }) {
    const level = useContext(LevelContext);
    return (
        <section className="section">
            <LevelContext.Provider value={level + 1}>
                {children}
            </LevelContext.Provider>
        </section>
    );
}
 1
 2
 3
 4
 5
 6
 7
 8
 9
10
11
12
13
14
15
16
17
18
19
20
21
22
23
24
25
26
import { useContext } from 'react';
import { LevelContext } from './LevelContext.js';

export default function Heading({ children }) {
    const level = useContext(LevelContext);
    switch (level) {
        case 0:
            throw Error(
                'Heading must be inside a Section!'
            );
        case 1:
            return <h1>{children}</h1>;
        case 2:
            return <h2>{children}</h2>;
        case 3:
            return <h3>{children}</h3>;
        case 4:
            return <h4>{children}</h4>;
        case 5:
            return <h5>{children}</h5>;
        case 6:
            return <h6>{children}</h6>;
        default:
            throw Error('Unknown level: ' + level);
    }
}
1
2
3
import { createContext } from 'react';

export const LevelContext = createContext(0);
1
2
3
4
5
6
.section {
    padding: 10px;
    margin: 5px;
    border-radius: 5px;
    border: 1px solid #aaa;
}

Now both Heading and Section read the LevelContext to figure out how “deep” they are. And the Section wraps its children into the LevelContext to specify that anything inside of it is at a “deeper” level.

This example uses heading levels because they show visually how nested components can override context. But context is useful for many other use cases too. You can pass down any information needed by the entire subtree: the current color theme, the currently logged in user, and so on.

Context passes through intermediate components {/context-passes-through-intermediate-components/}

You can insert as many components as you like between the component that provides context and the one that uses it. This includes both built-in components like <div> and components you might build yourself.

In this example, the same Post component (with a dashed border) is rendered at two different nesting levels. Notice that the <Heading> inside of it gets its level automatically from the closest <Section>:

 1
 2
 3
 4
 5
 6
 7
 8
 9
10
11
12
13
14
15
16
17
18
19
20
21
22
23
24
25
26
27
28
29
30
31
32
33
34
35
36
37
38
39
40
41
42
43
44
45
46
47
48
49
50
51
import Heading from './Heading.js';
import Section from './Section.js';

export default function ProfilePage() {
    return (
        <Section>
            <Heading>My Profile</Heading>
            <Post
                title="Hello traveller!"
                body="Read about my adventures."
            />
            <AllPosts />
        </Section>
    );
}

function AllPosts() {
    return (
        <Section>
            <Heading>Posts</Heading>
            <RecentPosts />
        </Section>
    );
}

function RecentPosts() {
    return (
        <Section>
            <Heading>Recent Posts</Heading>
            <Post
                title="Flavors of Lisbon"
                body="...those pastéis de nata!"
            />
            <Post
                title="Buenos Aires in the rhythm of tango"
                body="I loved it!"
            />
        </Section>
    );
}

function Post({ title, body }) {
    return (
        <Section isFancy={true}>
            <Heading>{title}</Heading>
            <p>
                <i>{body}</i>
            </p>
        </Section>
    );
}
 1
 2
 3
 4
 5
 6
 7
 8
 9
10
11
12
13
14
15
16
17
import { useContext } from 'react';
import { LevelContext } from './LevelContext.js';

export default function Section({ children, isFancy }) {
    const level = useContext(LevelContext);
    return (
        <section
            className={
                'section ' + (isFancy ? 'fancy' : '')
            }
        >
            <LevelContext.Provider value={level + 1}>
                {children}
            </LevelContext.Provider>
        </section>
    );
}
 1
 2
 3
 4
 5
 6
 7
 8
 9
10
11
12
13
14
15
16
17
18
19
20
21
22
23
24
25
26
import { useContext } from 'react';
import { LevelContext } from './LevelContext.js';

export default function Heading({ children }) {
    const level = useContext(LevelContext);
    switch (level) {
        case 0:
            throw Error(
                'Heading must be inside a Section!'
            );
        case 1:
            return <h1>{children}</h1>;
        case 2:
            return <h2>{children}</h2>;
        case 3:
            return <h3>{children}</h3>;
        case 4:
            return <h4>{children}</h4>;
        case 5:
            return <h5>{children}</h5>;
        case 6:
            return <h6>{children}</h6>;
        default:
            throw Error('Unknown level: ' + level);
    }
}
1
2
3
import { createContext } from 'react';

export const LevelContext = createContext(0);
 1
 2
 3
 4
 5
 6
 7
 8
 9
10
.section {
    padding: 10px;
    margin: 5px;
    border-radius: 5px;
    border: 1px solid #aaa;
}

.fancy {
    border: 4px dashed pink;
}

You didn’t do anything special for this to work. A Section specifies the context for the tree inside it, so you can insert a <Heading> anywhere, and it will have the correct size. Try it in the sandbox above!

Context lets you write components that “adapt to their surroundings” and display themselves differently depending on where (or, in other words, in which context) they are being rendered.

How context works might remind you of CSS property inheritance. In CSS, you can specify color: blue for a <div>, and any DOM node inside of it, no matter how deep, will inherit that color unless some other DOM node in the middle overrides it with color: green. Similarly, in React, the only way to override some context coming from above is to wrap children into a context provider with a different value.

In CSS, different properties like color and background-color don’t override each other. You can set all <div>’s color to red without impacting background-color. Similarly, different React contexts don’t override each other. Each context that you make with createContext() is completely separate from other ones, and ties together components using and providing that particular context. One component may use or provide many different contexts without a problem.

Прежде чем использовать контекст {/before-you-use-context/}

Контекст очень заманчиво использовать! Однако, это также означает, что его слишком легко использовать чрезмерно. Если вам нужно передать некоторые реквизиты на несколько уровней вглубь, это не значит, что вы должны поместить эту информацию в контекст.

Вот несколько альтернатив, которые вы должны рассмотреть, прежде чем использовать контекст:

  1. Начните с передачи реквизитов Если ваши компоненты не тривиальны, нет ничего необычного в том, чтобы передать дюжину реквизитов вниз через дюжину компонентов. Это может показаться трудоемкой задачей, но так становится ясно, какие компоненты используют те или иные данные! Человек, обслуживающий ваш код, будет рад, что вы сделали поток данных явным с помощью реквизитов.
  2. Извлекайте компоненты и передавайте JSX как дети к ним. Если вы передаете некоторые данные через множество уровней промежуточных компонентов, которые не используют эти данные (и передают их только дальше вниз), это часто означает, что вы забыли извлечь некоторые компоненты по пути. Например, вы передаете реквизиты данных, такие как posts, визуальным компонентам, которые не используют их напрямую, например <Layout posts={posts} />. Вместо этого, заставьте Layout принимать children в качестве реквизита и выводить <Layout><Posts posts={posts} /></Layout>. Это уменьшает количество уровней между компонентом, задающим данные, и компонентом, которому они нужны.

Если ни один из этих подходов вам не подходит, подумайте о контексте.

Примеры использования контекста {/use-cases-for-context/}

  • Тематика: Если ваше приложение позволяет пользователю изменять его внешний вид (например, темный режим), вы можете поместить провайдер контекста в верхней части вашего приложения,
  • Текущая учетная запись: Многим компонентам может понадобиться знать текущего пользователя, вошедшего в систему. Если поместить его в контекст, его будет удобно прочитать в любом месте дерева. Некоторые приложения также позволяют работать с несколькими учетными записями одновременно (например, оставлять комментарии под другим пользователем). В этих случаях может быть удобно обернуть часть пользовательского интерфейса во вложенный провайдер с другим значением текущего счета.
  • Маршрутизация: Большинство решений для маршрутизации используют внутренний контекст для хранения текущего маршрута. Так каждая ссылка "знает", активна она или нет. Если вы создаете свой собственный маршрутизатор, вы, возможно, захотите сделать это тоже.
  • Управление состоянием: По мере роста вашего приложения, вы можете оказаться с большим количеством состояния ближе к вершине приложения. Многие удаленные компоненты внизу могут захотеть его изменить. Обычно используется reducer вместе с контекстом для управления сложным состоянием и передачи его вниз к удаленным компонентам без лишних проблем.

Контекст не ограничивается статическими значениями. Если при следующем рендере вы передадите другое значение, React обновит все компоненты, читающие его ниже! Вот почему контекст часто используется в сочетании с состоянием.

В общем, если какая-то информация нужна удаленным компонентам в разных частях дерева, это верный признак того, что контекст вам поможет.

\<Recap>

  • Контекст позволяет компоненту предоставлять некоторую информацию всему дереву под ним.
  • Чтобы передать контекст:
    1. Создайте и экспортируйте его с помощью export const MyContext = createContext(defaultValue).
    2. Передайте его в хук useContext(MyContext), чтобы прочитать его в любом дочернем компоненте, независимо от его глубины.
    3. Заверните дочерние компоненты в <MyContext.Provider value={...}>, чтобы предоставить его от родителя.
  • Контекст проходит через любые компоненты в середине.
  • Контекст позволяет вам писать компоненты, которые "адаптируются к своему окружению".
  • Прежде чем использовать контекст, попробуйте передать props или передать JSX в качестве дочерних.

\</Recap>

\<Проблемы>

Замените сверление реквизита контекстом {/replace-prop-drilling-with-context/}

В этом примере переключение флажка изменяет параметр imageSize, передаваемый каждому <PlaceImage>. Состояние флажка хранится в компоненте верхнего уровня App, но каждый <PlaceImage> должен знать об этом.

В настоящее время App передает imageSize в List, который передает его в каждое Place, которое передает его в PlaceImage. Удалите реквизит imageSize, и вместо этого передавайте его из компонента App непосредственно в PlaceImage.

Вы можете объявить контекст в файле Context.js.

 1
 2
 3
 4
 5
 6
 7
 8
 9
10
11
12
13
14
15
16
17
18
19
20
21
22
23
24
25
26
27
28
29
30
31
32
33
34
35
36
37
38
39
40
41
42
43
44
45
46
47
48
49
50
51
52
53
54
55
56
57
58
59
import { useState } from 'react';
import { places } from './data.js';
import { getImageUrl } from './utils.js';

export default function App() {
    const [isLarge, setIsLarge] = useState(false);
    const imageSize = isLarge ? 150 : 100;
    return (
        <>
            <label>
                <input
                    type="checkbox"
                    checked={isLarge}
                    onChange={(e) => {
                        setIsLarge(e.target.checked);
                    }}
                />
                Use large images
            </label>
            <hr />
            <List imageSize={imageSize} />
        </>
    );
}

function List({ imageSize }) {
    const listItems = places.map((place) => (
        <li key={place.id}>
            <Place place={place} imageSize={imageSize} />
        </li>
    ));
    return <ul>{listItems}</ul>;
}

function Place({ place, imageSize }) {
    return (
        <>
            <PlaceImage
                place={place}
                imageSize={imageSize}
            />
            <p>
                <b>{place.name}</b>
                {': ' + place.description}
            </p>
        </>
    );
}

function PlaceImage({ place, imageSize }) {
    return (
        <img
            src={getImageUrl(place)}
            alt={place.name}
            width={imageSize}
            height={imageSize}
        />
    );
}
1

 1
 2
 3
 4
 5
 6
 7
 8
 9
10
11
12
13
14
15
16
17
18
19
20
21
22
23
24
25
26
27
28
29
30
31
32
33
34
35
36
37
38
39
40
41
42
43
44
45
46
47
48
49
50
51
52
export const places = [
    {
        id: 0,
        name: 'Bo-Kaap in Cape Town, South Africa',
        description:
            'The tradition of choosing bright colors for houses began in the late 20th century.',
        imageId: 'K9HVAGH',
    },
    {
        id: 1,
        name: 'Rainbow Village in Taichung, Taiwan',
        description:
            'To save the houses from demolition, Huang Yung-Fu, a local resident, painted all 1,200 of them in 1924.',
        imageId: '9EAYZrt',
    },
    {
        id: 2,
        name: 'Macromural de Pachuca, Mexico',
        description:
            'One of the largest murals in the world covering homes in a hillside neighborhood.',
        imageId: 'DgXHVwu',
    },
    {
        id: 3,
        name: 'Selarón Staircase in Rio de Janeiro, Brazil',
        description:
            'This landmark was created by Jorge Selarón, a Chilean-born artist, as a "tribute to the Brazilian people."',
        imageId: 'aeO3rpI',
    },
    {
        id: 4,
        name: 'Burano, Italy',
        description:
            'The houses are painted following a specific color system dating back to 16th century.',
        imageId: 'kxsph5C',
    },
    {
        id: 5,
        name: 'Chefchaouen, Marocco',
        description:
            'There are a few theories on why the houses are painted blue, including that the color repells mosquitos or that it symbolizes sky and heaven.',
        imageId: 'rTqKo46',
    },
    {
        id: 6,
        name:
            'Gamcheon Culture Village in Busan, South Korea',
        description:
            'In 2009, the village was converted into a cultural hub by painting the houses and featuring exhibitions and art installations.',
        imageId: 'ZfQOOzf',
    },
];
1
2
3
export function getImageUrl(place) {
    return 'https://i.imgur.com/' + place.imageId + 'l.jpg';
}
 1
 2
 3
 4
 5
 6
 7
 8
 9
10
11
ul {
    list-style-type: none;
    padding: 0px 10px;
}
li {
    margin-bottom: 10px;
    display: grid;
    grid-template-columns: auto 1fr;
    gap: 20px;
    align-items: center;
}

\<Решение>

Удалите свойство imageSize из всех компонентов.

Создайте и экспортируйте ImageSizeContext из Context.js. Затем оберните список в <ImageSizeContext.Provider value={imageSize}>, чтобы передать значение вниз, и useContext(ImageSizeContext), чтобы прочитать его в PlaceImage:

 1
 2
 3
 4
 5
 6
 7
 8
 9
10
11
12
13
14
15
16
17
18
19
20
21
22
23
24
25
26
27
28
29
30
31
32
33
34
35
36
37
38
39
40
41
42
43
44
45
46
47
48
49
50
51
52
53
54
55
56
57
58
import { useState, useContext } from 'react';
import { places } from './data.js';
import { getImageUrl } from './utils.js';
import { ImageSizeContext } from './Context.js';

export default function App() {
    const [isLarge, setIsLarge] = useState(false);
    const imageSize = isLarge ? 150 : 100;
    return (
        <ImageSizeContext.Provider value={imageSize}>
            <label>
                <input
                    type="checkbox"
                    checked={isLarge}
                    onChange={(e) => {
                        setIsLarge(e.target.checked);
                    }}
                />
                Use large images
            </label>
            <hr />
            <List />
        </ImageSizeContext.Provider>
    );
}

function List() {
    const listItems = places.map((place) => (
        <li key={place.id}>
            <Place place={place} />
        </li>
    ));
    return <ul>{listItems}</ul>;
}

function Place({ place }) {
    return (
        <>
            <PlaceImage place={place} />
            <p>
                <b>{place.name}</b>
                {': ' + place.description}
            </p>
        </>
    );
}

function PlaceImage({ place }) {
    const imageSize = useContext(ImageSizeContext);
    return (
        <img
            src={getImageUrl(place)}
            alt={place.name}
            width={imageSize}
            height={imageSize}
        />
    );
}
1
2
3
import { createContext } from 'react';

export const ImageSizeContext = createContext(500);
 1
 2
 3
 4
 5
 6
 7
 8
 9
10
11
12
13
14
15
16
17
18
19
20
21
22
23
24
25
26
27
28
29
30
31
32
33
34
35
36
37
38
39
40
41
42
43
44
45
46
47
48
49
50
51
52
export const places = [
    {
        id: 0,
        name: 'Bo-Kaap in Cape Town, South Africa',
        description:
            'The tradition of choosing bright colors for houses began in the late 20th century.',
        imageId: 'K9HVAGH',
    },
    {
        id: 1,
        name: 'Rainbow Village in Taichung, Taiwan',
        description:
            'To save the houses from demolition, Huang Yung-Fu, a local resident, painted all 1,200 of them in 1924.',
        imageId: '9EAYZrt',
    },
    {
        id: 2,
        name: 'Macromural de Pachuca, Mexico',
        description:
            'One of the largest murals in the world covering homes in a hillside neighborhood.',
        imageId: 'DgXHVwu',
    },
    {
        id: 3,
        name: 'Selarón Staircase in Rio de Janeiro, Brazil',
        description:
            'This landmark was created by Jorge Selarón, a Chilean-born artist, as a "tribute to the Brazilian people".',
        imageId: 'aeO3rpI',
    },
    {
        id: 4,
        name: 'Burano, Italy',
        description:
            'The houses are painted following a specific color system dating back to 16th century.',
        imageId: 'kxsph5C',
    },
    {
        id: 5,
        name: 'Chefchaouen, Marocco',
        description:
            'There are a few theories on why the houses are painted blue, including that the color repells mosquitos or that it symbolizes sky and heaven.',
        imageId: 'rTqKo46',
    },
    {
        id: 6,
        name:
            'Gamcheon Culture Village in Busan, South Korea',
        description:
            'In 2009, the village was converted into a cultural hub by painting the houses and featuring exhibitions and art installations.',
        imageId: 'ZfQOOzf',
    },
];
1
2
3
export function getImageUrl(place) {
    return 'https://i.imgur.com/' + place.imageId + 'l.jpg';
}
 1
 2
 3
 4
 5
 6
 7
 8
 9
10
11
ul {
    list-style-type: none;
    padding: 0px 10px;
}
li {
    margin-bottom: 10px;
    display: grid;
    grid-template-columns: auto 1fr;
    gap: 20px;
    align-items: center;
}

Обратите внимание, что компонентам в середине больше не нужно передавать imageSize.

\</Solution>

\</Challenges>

Комментарии